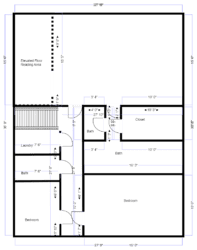
I’ve attached the two blueprints I have created along with some floor pictures.
One main question right out of the gate:
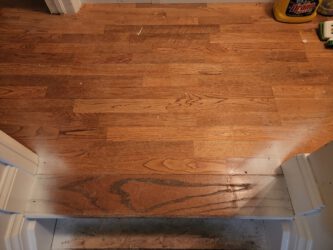
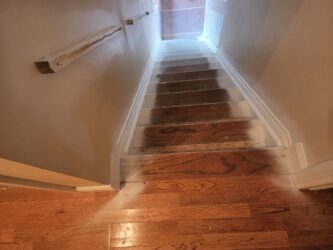
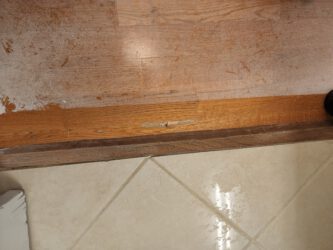
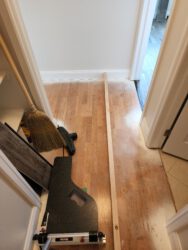
1. The home currently has engineered hardwood flooring. There was water damage to this flooring some years back and you can see from the picture that it is kind of “cupping” at the top of the planks. It also has a little bit of a bounce in different spots. Can I install over this flooring with leveler etc?
Thanks for the reply Joe! I’ll gather additional photos of the house and of the plan this afternoon.
I DO know the plan is Mathews and Parlo, lxp100, vinyl plank. The engineered wood that is in the home is indeed a floating floor. It was damaged by some flooding years ago, but kept in place by the previous owner. We live in CO at about 7000 ft elevation, so general humidity isn’t much a problem here….thankfully.
My plan is to start upstairs. I was thinking of running the planks parallel to the hallway like you suggested. I’m wondering if I should start in Bedroom 1 (attached photo) and work towards the hallway. I don’t have any problem with floor prep (stapling down the current floor & feather finish). I really don’t want to tear up the existing flooring eventhough it’s a floating floor. I’m also really hoping to not have to remove the baseboards. Is that wishful thinking? I have a small shoe trim that I was planning to install to cover my 1/4″ gap around the floor.
To answer your questions:
-The dash lines represent the raised floors in the main living room as you walk in the front door and in the master bedroom.
-The blank area you ask about at 8:36 in your video is access to the basement and won’t have vinyl.
-I’m wanting to install vinyl on all the floors with the hopes to not use any transitions.
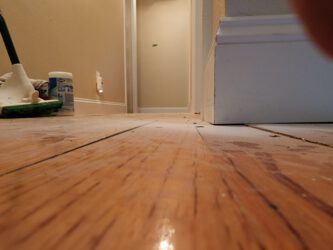
Attached are a couple photos of floor showing how it was installed. I thought these might help you understand how it was installed and what I’m working with. There are parts of the floor that have a little bounce in them and I’m hoping the stapling down will suffice.
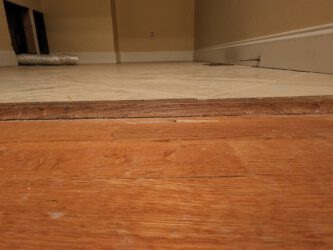
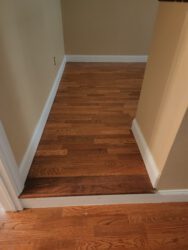
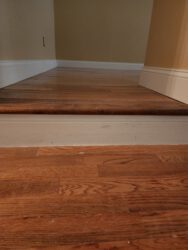
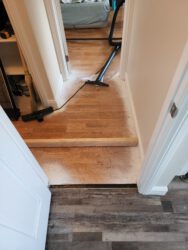
Thanks Joe! We went on vacation for a week, so I haven’t been in “floor” mode until now. I’ll be starting in tomorrow on the upstairs. Thanks for all the help and tips. I’ve ordered the padding per your recommendation. I think I have a good direction to get going. One question that did arise is what do I do (if anything) with the tile. The laundry room, hallway restroom, and master bath all have tile. I’m hoping to simply lay right over it, but the laundry tile has a small transition and sits maybe 1/4″ – 1/2″ taller than the rest of the existing flooring. The tile in the hallway bath and master bath sit level with the current flooring. Should I demo the tile out of the laundry or transition up?
Here’s a couple pics of that transition from the hallway into the laundry room (tile). I’d like to not have to demo out the tile and most likely transition up and lay right over the top of the tile.
When measuring the width of the hallway (video time 6:40)….do you measure from center of door jam to the opposite center of door jam. Or, from the edge of the hallway wall the opposite wall?
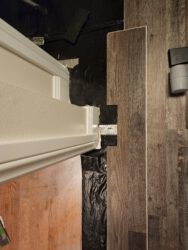
Two questions. I’ve approached my first doorway and closet in the 1st bedroom. You can see in picture 1 that I’ve got this cut and ready to attach. Is the Plane & Glue method best here?
Question 2:
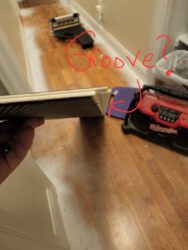
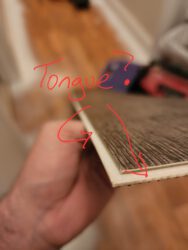
When I laid all this out, I went to shave the small groove off the female side and realized (I think) I started out backwards and have been working away from the groove instead of the tongue….oops! Can you look at the attached pics and confirm I now have this right?
With that said, do you still find it necessary to trim the female side and Plane & Glue?
1st bedroom is DONE and looks great. Thanks for all the advice.
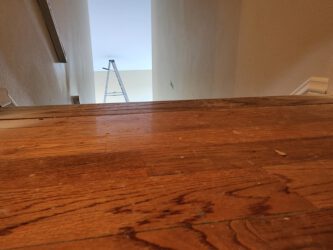
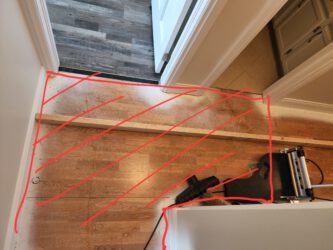
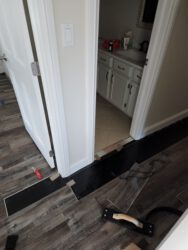
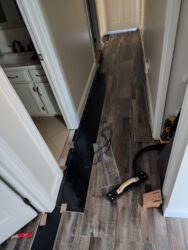
NOW – I’m needing to know the best approach to get the end of this hallway level. It’s 1.5″ out of whack. Would you install plywood, then feather it out with featherlight? Also…I’m wondering what to do as I approach the bedroom I just finished along with the other rooms that branch off the part of the hallway…since there will be such a variance in floor height.
You can see in the attached pictures the area colored in red is the dip. It starts about where that bathroom entrance is and slopes off towards the back wall of the hallway.
Thanks again for your help…joining the Flooring University was the best money I’ve spent in a while…LOL
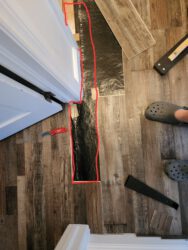
I should have included more pictures for you. Yes, I had completed that room, hallway and left just that back row screwed down to finish last (you’ll see that along the wall of the hallway). I should have built across the hallway into the 2nd bedroom, but I had only used a “scrap” pc to connect the hallway to the finished bedroom whereas I should have completed it as I went. Here’s some more pics.
Also…I had taken out that board you drew over with blue to get that last pc installed in the way you explained. Tapping it from the short edge along the long edges of the panel. I ended up breaking the pc that goes around the doorjam so I had to pull it all apart and start over…which is when I thought it a good idea to ask your thoughts.