-
Brayden’s Blueprint
Hi Joe,
I am very grateful to have discovered your community.
We are planning to sell our house, and the old laminate was in bad shape so we determined it would be in our best interest to replace it. While I have a decent amount of experience doing renovations, I have been wary about doing flooring. After discovering your community I have become confident that it’s something I can tackle. I am looking forward to gaining the experience to do this type of project, and trust that with your guidance the job will be a success.
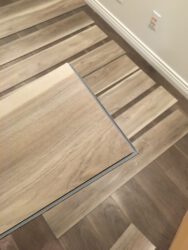
The material we settled on is an SPC vinyl plank. Due to a limited budget we had to go with a thinner plank (4.2mm). I did compare various options and it seems to be a decent material despite being on the thin side. The locking system is quite strong (requires a decent amount of force to break), and the planks seem to lock together quite easily and uniformly, forming a strong connection.
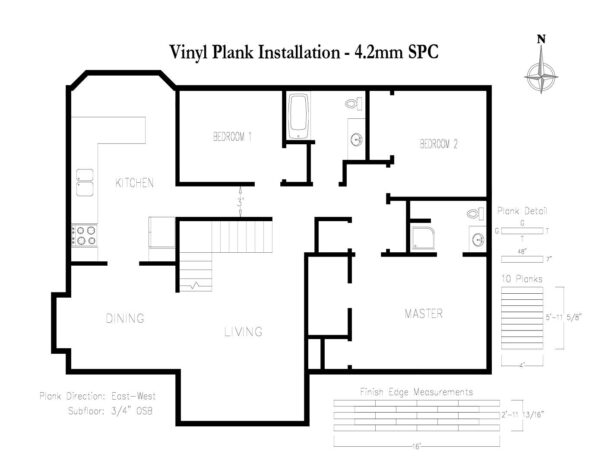
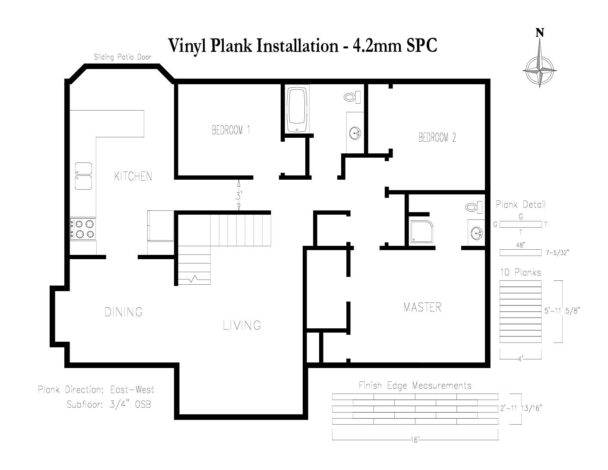
I plan to install the plank continuously throughout the entire second floor, including the two bathrooms and kitchen. I will also be installing the plank on the stairs, as well as in a small area at the bottom of the stairs. I anticipate that the biggest obstacle will be that there is a stairwell in the center of the house. This requires that the floor loop around it and reconnect after running through multiple areas. It appears to be a challenge, but since it was done with the previous laminate without a transition, there has to be a trick.Given the locking system orientation on the new plank, it seems that installation would need to start in either the kitchen or the master bedroom to work away from the groove. Both will require working backwards into multiple areas. I have determined that if I start in the kitchen I wouldn’t be working backwards for the loop around the stairwell. The old laminate appeared to have started in Bedroom 2, however the locking system was the opposite orientation.
I appreciate all the knowledge you are sharing and I am looking forward to collaborating with you through this project.
Brayden
Some questions:
– Being that we have a thinner plank, two planks stacked on top of eachother isn’t tall enough to function as a cheater board which presses against the drywall, as the drywall is raised up off the subfloor higher than the height of 2 planks. Should I cut a piece of plywood the same dimensions as a cheaterboard plank that’s high enough to use as a cheater board? Or is there another way?– Our hallway is 3’ wide. I joined 5 planks and it measured 2’11-7/8” tounge to groove. This seems good from the aesthetic of looking down the hall, but it will mean my joints wont fall in the center of the doorways. Would I start with half a plank on each side and have a joint run right down the middle of the hallway?
– We are planning to run the flooring east-west. Since the planks would be perpendicular to the stairs, I believe that the top stair nosing will need to overlap the planks, rather than being flush like the rest. It seems commonplace in my area to have somebody fabricate custom nosings out of the same vinyl plank material. Do I need to have the top nosing fabricated before I can begin installing, so I know exactly where the planks need to be cut back to at the top stair?


Log in to reply.