Activity Feed › Forums › Where should I start – Post drawings and questions › Blueprint request
-
Blueprint request
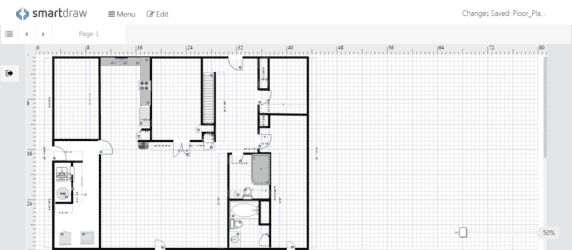
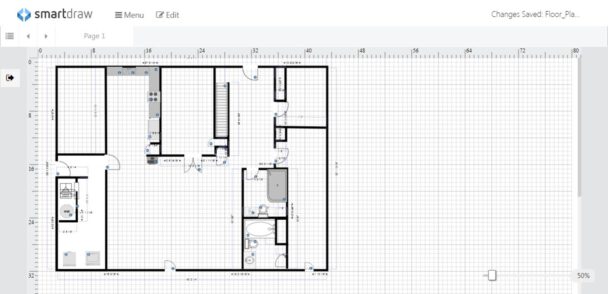
Posted by afdarsey on October 2, 2022 at 9:08 pmI used the SmartDraw to make a very rough floor plan. I was not able to export to jpeg without purchasing the program. I did take two screenshots hope you can use the attached files .pdf and .png. just in case one doesn’t open for you. Thank you for providing this service, it is great to have your experience along the way. I am putting down Lifeproof lvp throughout the whole house downstairs and one flight of stairs going up. I drew out the first plan and it has the exact measurements. The room left of the kitchen and north of the laundry room is outside the house so there is no plank there. I couldn’t delete those walls. 1546 sqft total including the steps.
afdarsey replied 2 years, 11 months ago 2 Members · 25 Replies -
25 Replies
-

Joe, you can call me Frank my middle name is Francis. Great video, you and your family are very welcome. I love having your experience guiding me through this project. This is precisely the guidance I needed to have this go smoothly. Here are the answers to the questions. I have also included some pics.
You have the direction correct North is at the top of the blueprint.
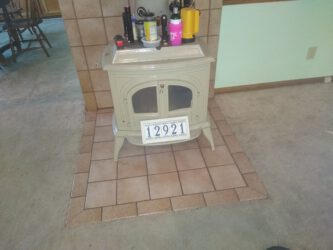
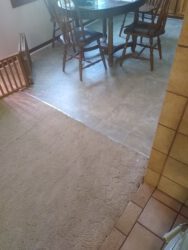
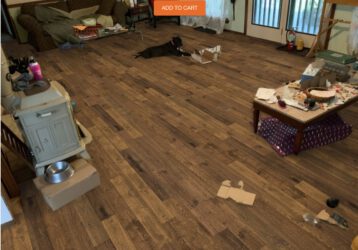
<font face=”inherit”>On direction I wanted to go east west or west east. I thought it looked best. See picture with super imposed planks. (there is tile under and around wood stove not </font>visible<font face=”inherit”> in super imposed picture) I like the last option you gave starting in the family room and working north. This will give me room to slide </font>furniture<font face=”inherit”> and appliances over to once the family room has been done. </font>
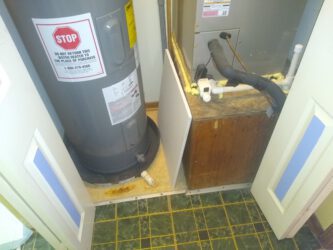
<font face=”inherit”>I was not planing to go into the hot water heater closet but if you think draining and lifting the hot water heater is </font>possible or worth it looking nice<font face=”inherit”> I will consider. The transition in that closet is cut in half and looks odd. The 2 boxes in the master and the one box in the spare bed room are closets. The larger closets in both have double folding doors and the smaller one in the master has one folding door. </font>
<font face=”inherit”>Demo</font>
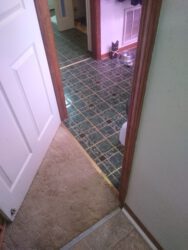
<font face=”inherit”>We have carpet and pad on top of (tack board) wood </font>sub floor<font face=”inherit”> in all rooms except for the </font>kitchen (linoleum)<font face=”inherit”> and the laundry room (vinyl stick on tile). See picture of transitions from carpet. In theory the sub floor is solid except for one spot in the laundry room. I anticipate cutting out and replacing it. I am guessing you will instruct to remove the </font>linoleum<font face=”inherit”> and </font>stick on<font face=”inherit”> tile from kitchen and the laundry room. I am looking forward to removing the giant white quarter round from under the kitchen cabinets. I do like your idea of pulling all the baseboards and putting them back. That looks </font>professional instead of quarter round. This house was built in 1987 and the baseboards are 3″. I will have to get creative with the table saw and cut a 3 1/4 store bought piece if I break any baseboards while pulling them off. We shall see how that goes. Lastly how would you transition to the tile around the wood stove? The tile slopes on the edge and is not square. Will the plank butt up against it and will that look good? I have purchased the tools you have recommended for the job (bump block, pull bar and even the small plainer. I have the plank sitting on pallets in the barn outside. I bought the wicking quiet pad you recommended. I have a 12″ chop saw and a 10″ table saw I thought I would use for the plank cutting. Both have finishing blades (high tooth count) on them. Just thought of this should I spray something on the sub floor once I pull the carpet and pad? Bleach, peroxide? Our dogs have accidents and the owner before us had dogs too. My thought was if something is growing on the sub floor giving it a light spray then letting it dry before putting down the pad and plank.
Let me know your thoughts and any other questions you have. I have years of projects here at our place this is the largest one. Thank you again, take care.
<font face=”inherit”>
</font> -
I am on the road today and I will get to this first thing tomorrow.
-
-
Thanks Joe, I was on the road all day yesterday sorry I didn’t replay sooner. Great advice on the transitions I will look into those and order the correct size. Yes is the answer on not going into the WH closet and your new layout has the closets correct. Ther are 7 closets in the down stairs including the WH closet. I will start in the family room and go from there. Do you need exact room measurements from me? I will pull up some corners and investigate tile and lanolin to sub floor height.
-
-
-
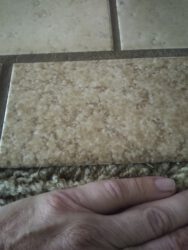
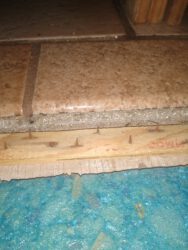
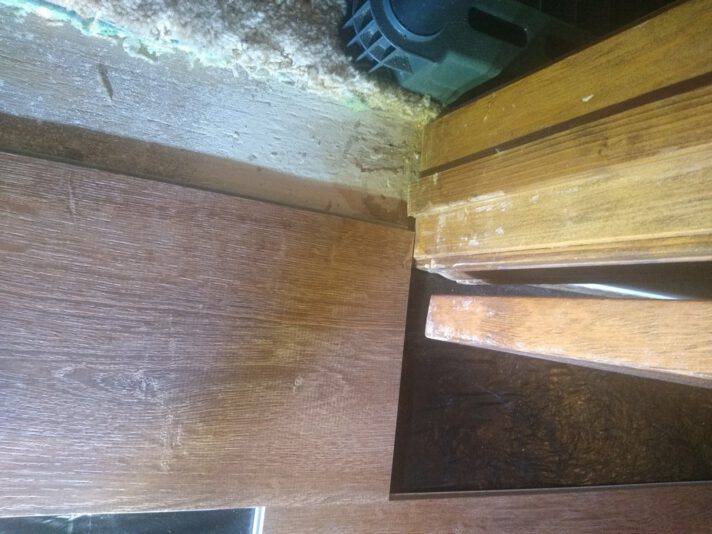
I pulled up the carpet around the wood stove tile and the tile is on some kind of backer board. see pics for measurement of height from sub floor. Looks like 1/2″ board and 1 3/4″ to the top of the tile.
-
-
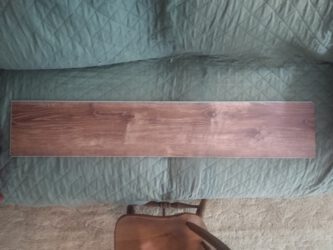
When you tear that carpet up place a plank against the tile and take a pic then. I will then be able to get a better idea of what to do there.
-
-
Good news I have started the demo, we have a business and market each week and part time jobs so the floor got pushed into November. I cannot say how good I feel about the blueprint and your prayers for success. Thank you. Here are some questions.
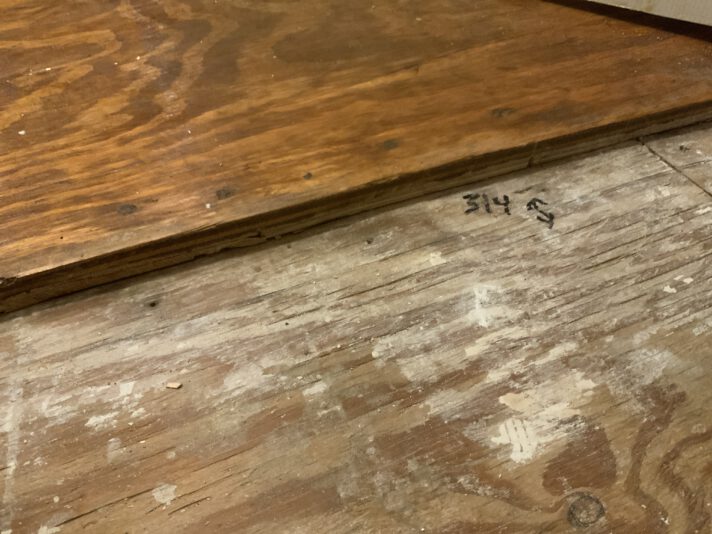
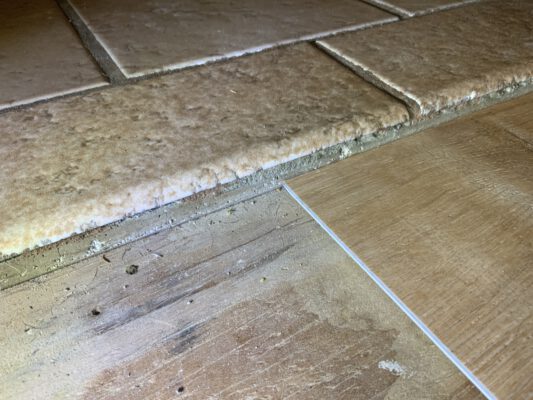
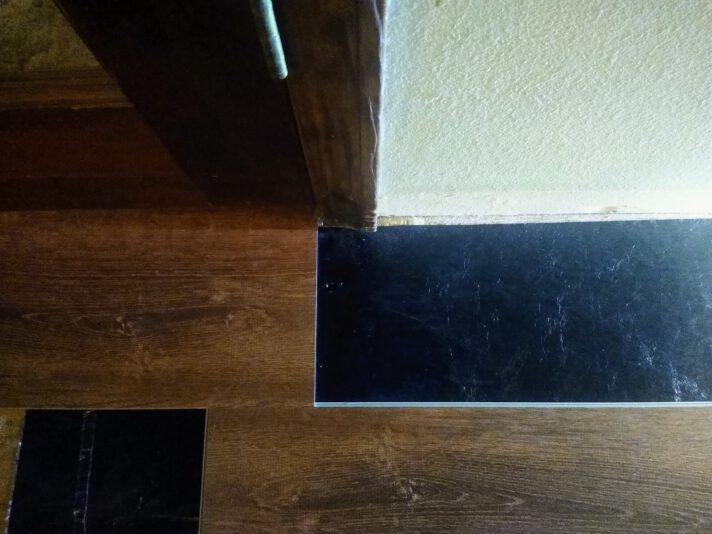
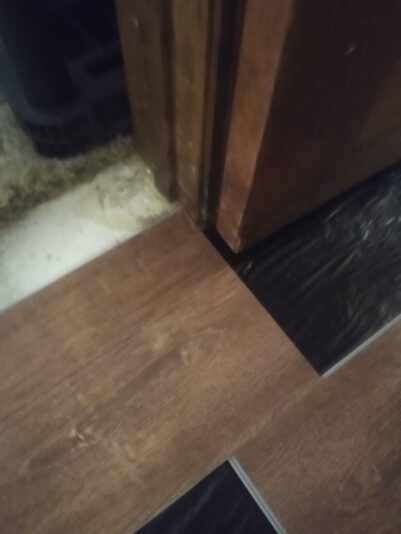
The living room is 198” and half puts me at 99” to pop my line down the middle of the room. My cheat sheet looks like 10 planks are 86.3/4 and 20 are 173.1/2 at 198 I am at almost a full plank and in the door way at the double doors. The bathroom doorway was a surprise looks like they layed 3/4 plywood down on top of the subfloor so it steps up from the hallway by 3/4”. So what are your thoughts on the bathroom transition and also around the wood stove. The wood stove tile is about 7/8” off the subfloor. See photos. I have looked at the Schluter transitions and will look again now that i know the 7/8”jump around the wood stove and the 3/4” jump at the bathroom door. Maybe I need one there as well. Have a great weekend.
Lastly when you measure a room do you go under the sheet rock and bring it back toward you 1/4”? Also I am putting down the quite walk lv underlayment and following their instructions. Looks like it floats under the plank and should not be taped to the sub floor. Only the seems are taped. fyi using life proof lvp how important is it to bring in the flooring before installing. Our barn where the pallets of plank are is about the same temp as our house we are not running ac currently.
Thank you and take care with faith, love and hope.

-
-
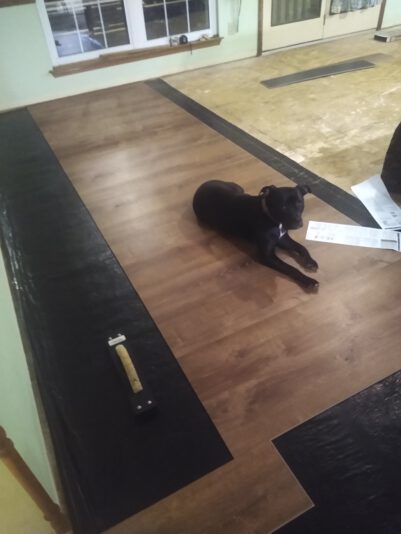
I laid down the underlayment and some plank. I thought the living room might fit all the rows of plank wall to wall but the last piece was too wide buy 2-3”. Here are some pictures of where the planks fell when I laid them out. The double doorway looks like a match, and I think the bathroom door is doable with a piece of plank wrapped around the door jamb and the wall and another piece going the other way. can i start my first row up against the wall footer under the drywall if my last piece lands in the double doorway? Here are some photos.
-
-
I am out of the office until tomorrow and then I can help.
-
-
Thank you Joe, that is good advice on the transitions. I am almost to those areas laying plank. Worked on it Monday and it looks great. I have to go out of town and I will try to get as much down before I go. I will leave space to shoot a nail or glue down the 2 different transitions.
My stairs go up and I would like to cover them. Is there a better nose rail source other than lowes or homedepot? I have purchased the loctite construction adhesive 4x to glue the plank down. I think I watched your video where you recommended to pull the foam pad off the back of the plank. Thank again for all of you help and expertise..
-
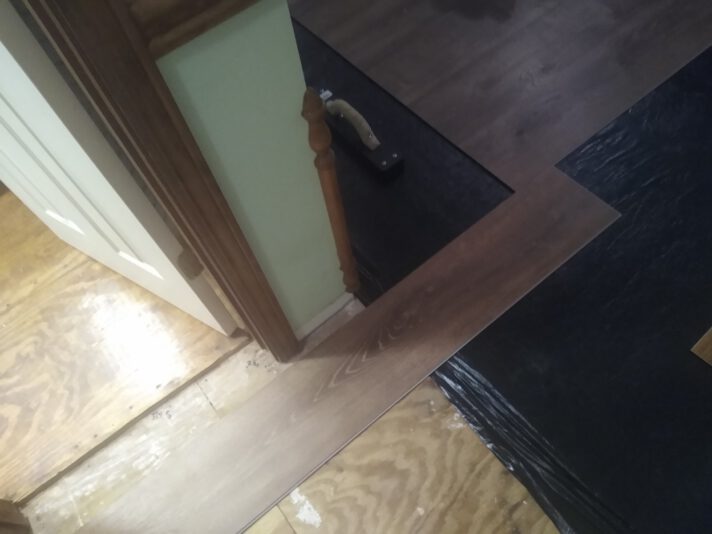
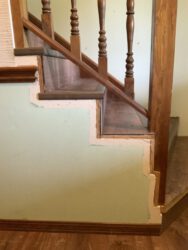
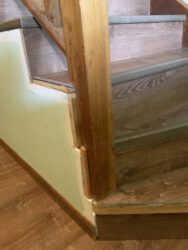
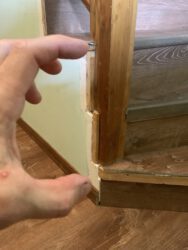
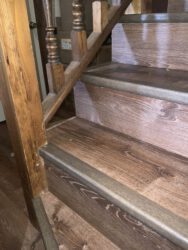
Well it took about a month’s worth of work days but I have finally come to the end of the flooring project. Thank you very much for your prayers and confidence given through your guidance. I need your advice on how to finish the steps around the banister post base. The steps had carpet which allowed it to appear to be done well. Specifically around the outside of the last 2 steps. How would you make the post look clean? my brain melted when i got to the end of the steps. I would like to use the nose rail pieces on the ends of the tread and riser but around the bottom of the post it doesn’t look right? I thought of nailing a stained piece of oak to the post going half way up the outside then cutting the top at an angle. Please advise what you would. Hope the pictures help. Thanks in advance. Frank
I was also going to cut and move the chair rail away from the top step and re-nail it so there is room to put the nose rail on the riser end.
-
-
-
I’m not at my desk today to be able to answer this with video so I will answer this either tonight or 1st thing tomorrow morning.
-
thanks Joe, just making sure I am on you reply list. thanks in advance.
-
-
-
Fantastic, no worries on the delay. Glad you too thought it was an odd way to end the steps with the post and the wall. I hope to wrap things up soon and i’ll post some pics and thank you again for all of your help. Take care.
-

Log in to reply.